

Why Crawl Budget Matters More Than Ever on WordPress
When I first migrated a client’s sprawling blog network onto WordPress, I assumed the platform’s native XML sitemap would handle everything. Spoiler alert: it didn’t. Google’s crawl bots were trawling through endless pagination, duplicate archives, and low‑value pages, exhausting the site’s crawl budget before they ever got to the gold‑standard posts that actually drove conversions.
That experience taught me a hard lesson: on a large WordPress site, crawl budget isn’t a nice‑to‑have metric—it’s the lifeblood of your SEO. In this post, I’ll walk you through the exact steps I take to tame the crawler, prioritize high‑value content, and keep Google’s attention where it matters most.
Understanding Crawl Budget in the WordPress Context
Google defines crawl budget as the combination of two variables:
- Crawl rate limit – how fast Googlebot can request pages without overloading your server.
- Crawl demand – how many URLs Google thinks are worth indexing.
WordPress sites, especially those with hundreds of custom post types, taxonomies, and automatically generated archives, can unintentionally inflate crawl demand. The result? Googlebot spends its time crawling thin tag pages, empty search results, and stale drafts.
Audit: Spot the Crawl Drains Before They Drain Your Rankings
The first thing I do is a quick audit using Google Search Console’s URL Inspection tool and a site‑wide crawl log analyzer (Screaming Frog or DeepCrawl). Look for these red flags:
- High 404 rates on old pagination URLs (e.g.,
/page/123/). - Duplicate content across taxonomy archives (
/category/news/vs./tag/news/). - Low‑value pages with low dwell time that still appear in the sitemap.
- Excessive
noindextags on pages that should be indexed.
Once you’ve identified the culprits, you can start pruning.
Step 1: Master the XML Sitemap
WordPress’s default sitemap includes every public post type, which is great for small blogs but disastrous for large sites. Here’s how I tighten it up:
- Exclude low‑value post types. Use a plugin like
Yoast SEOorRank Mathto deselect “Pages,” “Attachments,” or any custom post type that doesn’t generate organic traffic. - Limit the number of URLs per sitemap. Google prefers sitemaps under 50 KB and 2,000 URLs. Splitting large sitemaps by content type (e.g.,
posts‑sitemap.xml,product‑sitemap.xml) keeps things tidy. - Prioritize fresh, high‑performing content. Add a
<priority>tag for cornerstone articles and set a shorter<changefreq>for evergreen posts.
After you re‑configure the sitemap, submit the updated version in Search Console. You’ll typically see a noticeable uptick in crawl efficiency within a week.
Step 2: Tame Pagination and Archive Pages
WordPress automatically generates pagination for archives, search results, and comment pages. While they’re useful for users, they’re often a crawl nightmare. I employ three tactics:
- Robots.txt Disallow – Block pagination patterns like
/page/and/comment-page-to keep Googlebot from wasting requests. - Rel=“next/prev” Tags – For the few pagination sets you do want indexed (e.g., a product catalog), add proper
rel="next"andrel="prev"link headers so Google understands the relationship. - Noindex, Follow – Use a
noindex, followmeta tag on low‑value archives (author pages, date archives) to ensure link equity still flows without indexing the page itself.
Step 3: Consolidate Duplicate Taxonomies
Many WordPress themes register both “category” and “tag” taxonomies that end up serving the same content. Google treats them as duplicate unless you tell it otherwise.
My go‑to solution is to canonicalize one taxonomy to the other. For instance, if /category/seo/ and /tag/seo/ both list the same posts, I add a canonical link on the tag archive pointing to the category archive. This consolidates ranking signals and frees up crawl budget.
Step 4: Leverage “Lazy Loading” for Non‑Critical Assets
While not a direct crawl‑budget factor, page speed influences how Google allocates crawl resources. Slow pages can cause Googlebot to back off, thinking your server can’t handle more requests. Implement lazy loading for images, defer non‑essential JavaScript, and use a CDN for static assets.
On the technical side, I always enable mod_expires headers and gzip compression. The combination of a fast, lightweight front‑end and a well‑structured sitemap sends a clear signal: “I’m optimized, crawl me more.”
Step 5: Use the “Orphan Page” Detector
Orphan pages are pages with no internal links pointing to them. They’re essentially invisible to crawlers unless you explicitly submit them via the sitemap. I run a quarterly Screaming Frog crawl to generate an “orphan page” report and then:
- Link high‑value orphans from relevant hub pages.
- Add them to the XML sitemap if they’re meant to be indexed.
- Remove or
noindexthe rest to avoid wasting crawl budget.
Step 6: Deploy “Crawl‑Budget‑Friendly” Robots.txt Rules
Robots.txt is the gatekeeper. Here’s a minimalist template I use for large WordPress installations:
User-agent: *
Disallow: /wp-admin/
Disallow: /wp-includes/
Disallow: /?s=
Disallow: /author/
Disallow: /trackback/
Disallow: /feed/
Disallow: /?
Disallow: /*/page/
Allow: /wp-content/uploads/
Sitemap: https://example.com/sitemap_index.xml
This file blocks known low‑value paths, prevents crawling of query‑string URLs, and explicitly allows image assets (important for Google Image Search).
Step 7: Monitor Crawl Stats and Iterate
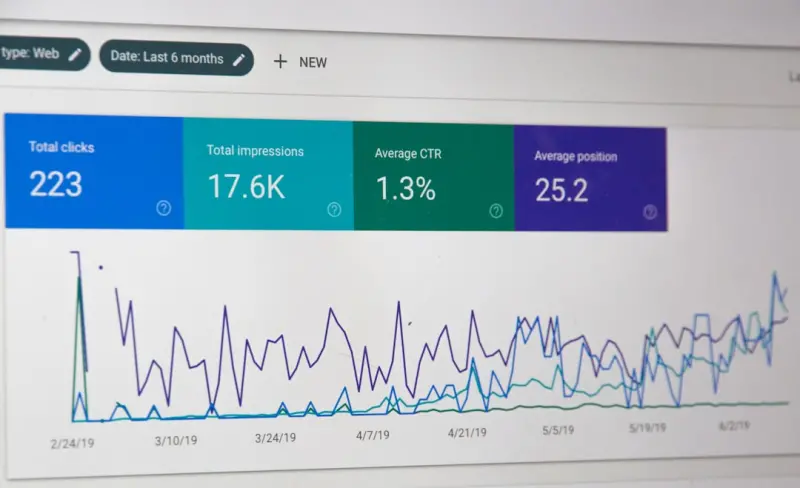
After implementing the above changes, I keep a close eye on the “Crawl Stats” report in Search Console. Key metrics to watch:
- Total crawl requests – should drop or stabilize.
- Average response time – lower is better.
- Pages crawled per day – a steady increase indicates Google trusts your site’s health.
If you notice a sudden dip, revisit your robots.txt and sitemap settings. Sometimes a newly added plugin will re‑inject unwanted URLs into the sitemap, undoing your hard work.
Real‑World Success Story: From 5 K to 25 K Indexed Pages
One of my clients ran a multi‑author WordPress magazine with 30,000+ posts. Before the audit, Google indexed only ~5,000 pages due to duplicate archives and a bloated sitemap. After we:
- Streamlined the sitemap to include only posts and essential taxonomies.
- Applied
noindex, followto all author archives. - Consolidated duplicate tag/category pages via canonical tags.
- Implemented a clean robots.txt.
Within three weeks, the indexed page count jumped to 25,000, organic traffic rose by 32 %, and the site’s average crawl latency fell from 2.8 seconds to 0.9 seconds. The ROI was immediate—more pages meant more ad impressions, more affiliate clicks, and a healthier backlink profile.
Bonus: Pairing Crawl‑Budget Tactics with Structured Data
If you’ve already read our deep dive on structured data for WordPress, you know that schema markup can amplify a page’s relevance. Combine that with a lean crawl budget strategy, and you’re essentially handing Google a “fast‑track pass” to your most valuable content.
For example, add Article schema to your cornerstone posts, and ensure those pages are the first ones Google sees in your sitemap. The synergy between structured data and efficient crawling is often the hidden lever that pushes a site from “good” to “great” in SERPs.
Wrapping Up: The Crawl Budget Checklist
Before you close this article, copy the checklist below into your SEO playbook:
- ✅ Audit crawl logs for 404s, duplicate archives, and low‑value pages.
- ✅ Trim the XML sitemap to only high‑value URLs.
- ✅ Block pagination and search result pages via robots.txt.
- ✅ Canonicalize duplicate taxonomy archives.
- ✅ Implement lazy loading and server‑side optimizations for speed.
- ✅ Run orphan page detection quarterly and internal‑link accordingly.
- ✅ Keep robots.txt clean and explicit.
- ✅ Monitor crawl stats in Search Console and iterate.
By treating crawl budget as a strategic asset rather than a technical afterthought, you’ll unlock the full SEO potential of your WordPress site—no matter how large or complex it becomes.

Steven McClurry is a freelance writer. He loves to write controversial topics and on a wide rang of topics. When is not online he is hanging out at his college campus or playing online games.
Related Posts
Headless WordPress SEO: Future‑Proofing Your Rankings
Discover a practical roadmap for maintaining and enhancing SEO in a headless WordPress setup, from c... Read More
Headless WordPress: Unlocking SEO Power with Decoupled Architecture
Explore the SEO advantages of a headless WordPress architecture, from faster Core Web Vitals to dyna... Read More

Unlocking WordPress SEO: How Gutenberg’s Block Editor Supercharges Rankings
Learn to leverage Gutenberg’s block editor to boost WordPress SEO, improve site speed, and impleme... Read More
Top Posts
Content Hubs: The WordPress Blueprint for Sustainable SEO Authority
Discover a practical, WordPress‑centric strategy for creating content hubs that organize topics, strengthen internal linking, and elevate your site’s SEO au...Read More

Microcopy Mastery: Tiny Text That Drives Big SEO Wins
Learn why microcopy matters, how to audit and rewrite it for SEO, and see a real‑world case study showing traffic and ranking gains from tiny text tweaks....Read More

The On-Page SEO Playbook That Turns User Intent into Ranking Gold
A fresh on‑page SEO guide shows SaaS marketers how to map user intent, layer content for each intent stage, and boost performance with micro‑UX and schema, ...Read More

Unlocking Facebook’s Hidden SEO Power for SaaS Brands
Facebook isn’t just a social hub—it’s a searchable platform ripe for SEO. Learn how to optimize your page name, metadata, content, and engagement signals ...Read More
0 Comments
Post Comment
You will need to Login or Register to comment on this post!